A rollover image on a website is an image that when rolled over with by a cursor, will change. This change could be an edited version of the original image or a totally different image. Rollover images can be used all over a website including for links and just for attractiveness to the eye. The most popular use for rollover images is for links on a website. They are perfect for links because they tell the user when they are over a link or button.
1.The first step in creating a rollover link is not in DreamWeaver but is in Photoshop. Bring the image that you want to be a rollover image into photoshop.
2.Edit it so that it fits the size of the link buttons or just the size that you want it to be on the website.
3.Once the original image is cut down to the right size, save the file for web into your images folder inside your root folder. Save this image as something that you can recognize as the original image (For example, “originalimage”).
4.Once this is saved into your image folder, you can begin editing it to be the rollover image. While you are editing the image, keep in mind that it will be what appears when a cursor is over the original image. Because of this, make sure that the contrast of the edited image still matches with the colors of the website.
5.When you have created the rollover image, save it for web and save it into the images folder. Be sure, again, to save the rollover image as something that you can recognize (For example, “rolloverimage”).
6.The next step is to put the images into DreamWeaver and into your website. First insert a div to where you want the rollover image to be.
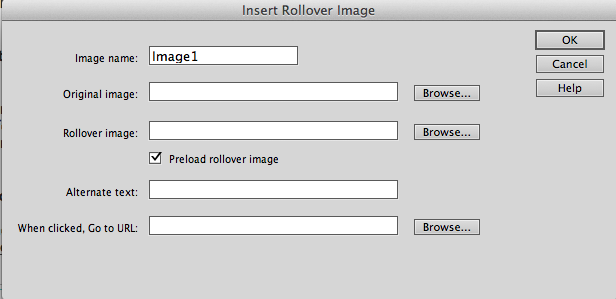
7.Click inside the div, and go up to Insert, Image Objects, and lastly Rollover Image. Name the image something recognizable.
8.Then click Browse, next to Original Image and select the original image.
9.Next, click Browse, next to Rollover Image, and select the rollover image.
10. Click Ok and then check if it worked in live view.