


Rollover Images
When creating a rollover image, you first have to edit the photo in Photoshop. First thing is to choose an image that you want to have as your rollover. When you upload a picture into Photoshop, the next thing that you have to do is select the edit that you want to apply to the rollover image. Once you have edited your image and have saved it for the web, you can now open it into Dreamweaver.
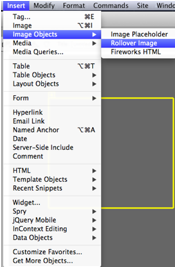
When you are in Dreamweaver and have your page set up with a container, draw a new div to hold the rollover image. Once you have this done you can go into Insert → Image Objects → Rollover Image.
After you select the Rollover Image option, a menu will pop up with the choices of what the original image is going to be, and what the rollover image is going to be.
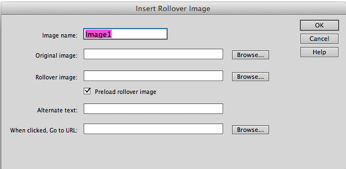
This is the screen where you are to upload the pictures that you have edited in Photoshop. The ‘original image’ is the image that will be visible before you rollover it, and the ‘rollover image’ is the image that is visible after you have rolled over it. Once you have completed this and hit 'OK' you are done!
Step one in Dreamweaver
Step two in Dreamweaver

Lorum | Ipsum | Dolar | Sic Amet | Consectetur
©2008 Lorem Ipsum Dolar Sic Amet • Consectetur