


Setting Up A Page In Dreamweaver
Setting Up Your Root Folder
Before creating a site in Dreamweaver, it is important to create your root folder which holds all your files relating to your site. Here’s how:
1. Create a new folder (I typically create mine in the Documents section)
2. Name your folder- it should be all lower case and no spaces. If you want a space use _ (underscore) instead.
3. Inside this root folder you need four other folders: css, images, sources, and notes
Whenever you create an HTML file, it should be saved at the main level of your folder. Here’s an example:
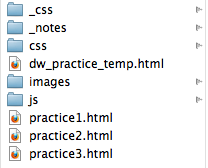
All of the .html files are at the main level of my folder structure. Any external css folders go in the css folder, all images being used in the images folder, and any images that you edited before using, you put the original image in the sources folder, as well as any images you might use.
Once you have set up your folders, Dreamweaver will mirror your folder set-up in the Files panel.
Setting Up HTML and CSS Files
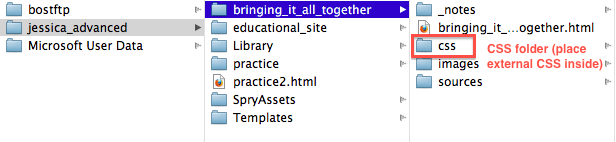
After setting up a page in Adobe Dreamweaver, you first need to create an external CSS file. This is where all of your CSS code will go for your site. Using external CSS is helpful because you can use the code for multiple different pages. To set up the external CSS, go to File --> New --> CSS (under Blank Page options) then hit Create. After creating the CSS file make sure to save it! It should be saved in your CSS folder which should be placed inside your root folder. For example, here is my root folder:
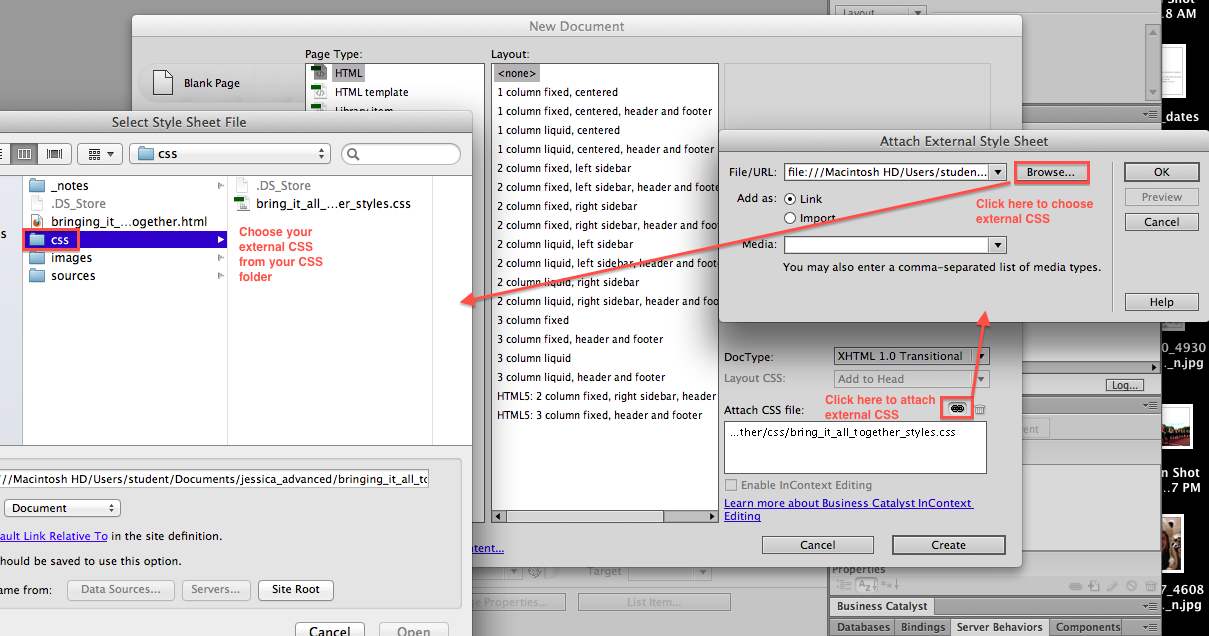
Next, go to File --> New --> HTML (under Blank Page options). Before hitting Create, attach it to the external CSS file you just created. Once you have chosen your external CSS, create the HTML file and save it into your root folder.
Setting Up Basic Layout
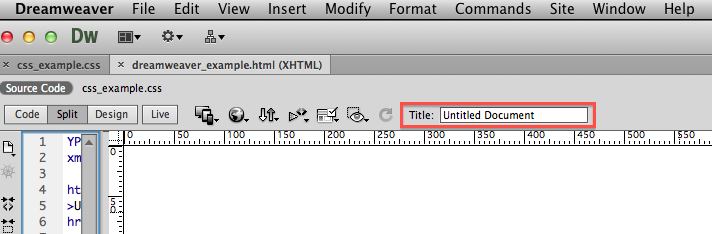
Open your HTML file. At the top of enter the title of your site. It should be entered as site title | page. For example:
Bringing It All Together | Home.
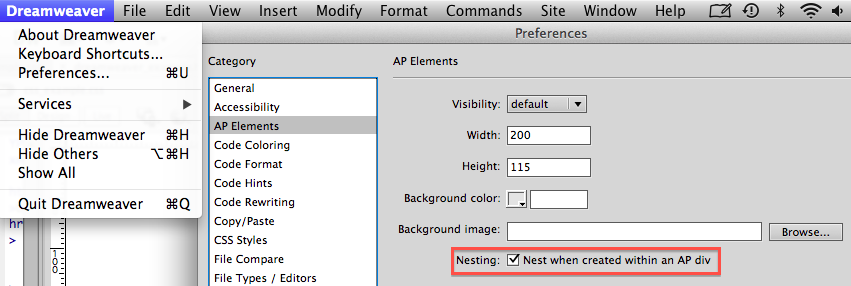
Next, go to Dreamweaver --> Preferences --> AP Elements. At the bottom, check Nesting on.
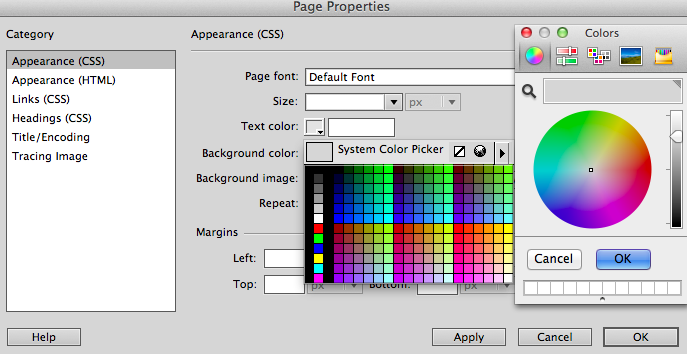
To set up a background color for your site, go to Modify --> Page Properties. Under Appearance (CSS) go to Background Color and choose a color, or type in a hex code.
To create the container of your site:
1.Go to Split View, click inside the code section, and select the body tag below the code section.
![]()
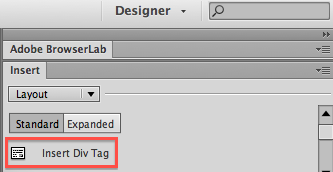
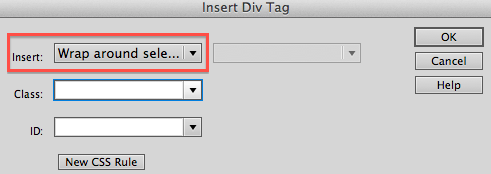
2. Choose Insert --> Div Tag (upper right hand corner of Dreamweaver window). In the insert box it needs to say Wrap Around Selection. If it doesn’t, click on the design side of the window, and try selecting the body tag again.
3. Select the outline of the container (it should become blue).
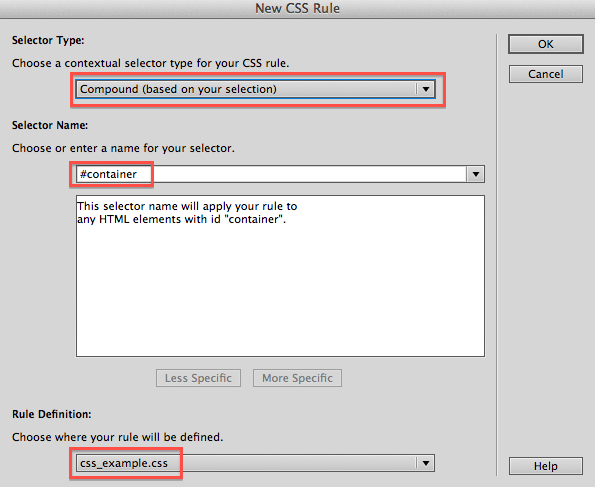
4.Create a new CSS rule (this will apply only to the container). Make sure your CSS Styles Window is open (Windows --> CSS Styles).

5. The Selector Type: Compound (can apply only to this item), Selector Name: #container, Rule Definition: external CSS. Click OK.
6. Edit the Background, Box, and Positioning of the rule.
Background: color of choice
Box: width and height = ~1000, margin: left and right = auto
Positioning: relative
7. After applying this rule, make sure the container’s Div ID (bottom left corner) is container, otherwise the rules will not apply.
Congratulations! You have now created the container in Adobe Dreamweaver!
When you want to edit basic properties of your site, such as font, font or background color, etc.
To create divs inside the container (for text, images, etc.), click inside the container on the design side of Dreamweaver and choose Insert → Draw AP Div and draw out your div. You can always edit the div’s size in the bottom panel of the screen when you click on the divs outline.
Before finishing editing the div, you need to create a new class that you will apply to all divs that are not the container. To do this, first choose the New CSS Rule icon and create a new class rule named positioning_absolute, or something similar. To edit it, go to Positioning → Position: absolute. To apply this rule:
1. Click the div’s outline so the Properties Panel appears at the bottom
2. Choose Class → positioning_absolute
Congratulations! You now know how to set-up a basic page in Dreamweaver!
One other thing to remember:
Always name your div in the div ID box (left hand side of Properties Panel). Name it the page it is on_purposeofdiv.
Lorum | Ipsum | Dolar | Sic Amet | Consectetur
©2008 Lorem Ipsum Dolar Sic Amet • Consectetur